The Most Common Misconceptions About Right Hand Finger Action

by Rozanna Weinberger

Right hand finger action is a cause for bewilderment by many students. The myth is that the fingers must be trained to move back and forth,  to curl and straighten, to effect a proper bow hold.  While in principal its true these movements need to occur,  the movements are the effect of a chain of events in the bow arm and not the cause of those movements in such bow strokes as spiccato and of course detache & legato.

Screenshot 2016-04-23 02.17.08

Paint bristles react they do not initiate paint brush

To achieve this, Valborg Leland, who was a disciple of pioneering teacher D.C. Dounis explains one must find the *’naturally inclined position’ with respect to the fingers and wrist of the right hand. Once this is achieve the player can develop a feeling of ease in the right hand as fingers can begin to react to the arm weight. The opposite of this effortless feeling is to consciously initiate the finger action of the right hand.  One must conceive the fingers like the bristles of an artists  brush.  The fingers of the right hand are not just shock absorbers for the arm weight, they also react to the movements initiated by the arm, forearm and back when producing a sound.

  1. To find the naturally inclined position Leland suggests to begin by extending the arm in front of self with fingers outstretched.
  2. Allow the hand and fingers to drop as though limp.
  3. Bring the tip of the thumb and middle finger together like playing with a bow. The position created is the ‘natural inclination’ of the fingers and hand when bowing.
  4. The task in maintaining a proper finger technique hinges on maintaining this naturally inclined position. (Some players tend to have the wrist overly pronated because of a lack of balance in the hand, but returning to this very basic motion study well help orient the student to the most natural approach.) 

    Applying this understanding of maintaining the ‘naturally inclined position’ in the right hand can now be applied to actual detache practice.

  5.  Begin by placing the bow on the string at the middle of the bow. Relax the fingers and bow to its ‘naturally inclined’ position.
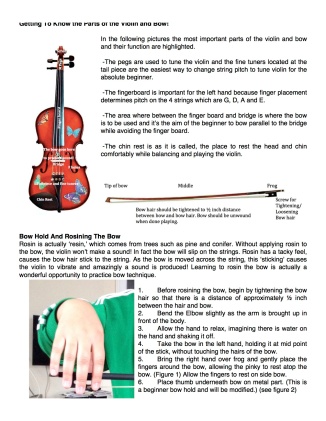
  6. Using the elbow like a hinge, begin playing by extending the forearm  towards the tip of the bow. The challenge is to not drop the wrist but to maintain this ‘naturally inclined’ position so that even when playing towards the tip of the bow, this relationship of the fingers is one of dangling passively from the hand & wrist.

Many players are inclined to bend the wrist downward too much when playing towards the tip of the bow. The biggest problem with this is that the fingers of the bow hand lose the ability to act like shock absorbers to the weight going into the string. The outcome is that the sound is no longer produced by arm weight into the string  but instead must be produced by pressing into the string with the hand and fingers. The result of such an approach will surely lead to excess tension, a pressed sound lacking resonance and too much effort in producing a sound in general. This extra work may not be obvious in the short term but is certainly felt when playing for an extended period of time.

  • From ‘The Dounis Principals of Violin Playing: Their Meaning and Practical Application’ by Aalborg Leland
Wrist vs Arm Vibrato: Which is better?

Rozannaby Rozanna Weinberger

Throughout my studies it was typical that various teachers would espouse preferences in vibrato,between arm or wrist. D.C. Dounis has an interesting perspective where he goes so far as to say one is inferior to the other. Continuing from the material covered from the interview between Samuel Applebaum and Dounis, this entry will examine more points made regarding optimal vibrato.

*I asked Dr. Dounis if he preferred a wrist vibrato, and his reply was, “Only with the wrist, never with the arm. The forearm moves, but the impulse is at the fingertips, which activates the wrist. The arm follows sympathetically.” 

Ordinarily I wouldn’t go so far as to weigh in on one type of vibrato is better than another however, from a functionality standpoint, I totally agree with Dounis.

The joints are a key aspect to understand why wrist vibrato is preferred and considered a more natural and less strained approach. Yes the arm should move, but the wrist has the ability to react. It can react to the momentum of the forearm and it can react to oscillations of the fingers.  It should not be trained to remain stiff without utilizing the more subtle back and forth movements that are possible.

Screenshot 2015-09-23 23.12.58

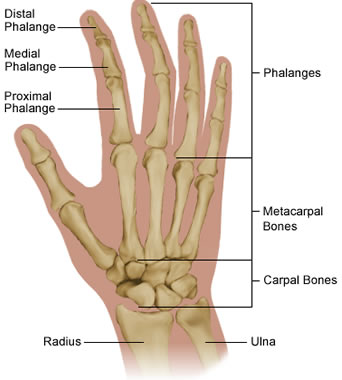
These lovely bones.

  1. Start by bringing up the left arm to play  without the instrument.  Allow the forearm to move back  and forth. Notice how the hand reacts, bending forwards and backwards from the wrist in reaction to the arm. This movement can be exaggerated to extend the arm back down to the side then up to playing position.  Regardless, the wrist and hand can respond to the forearm.
  2. Repeat the above but this time make a point of not moving the hand and not allowing it to react. Notice how the wrist and hand become more stiff as tension is required to maintain this position in the hand, wrist and arm. Why would anyone want to play with this kind of feeling in the left hand, when playing in front of people is challenging enough without doing things the hard way. Go back to step 1 and allow the hand and wrist to react to the forearm. Notice the difference.
  3. This time move the wrist back and forth but without the forearm movement. Notice the amount of effort required to ‘move’ the wrist back and forth rather than allowing it to react to a chain reaction of movements in the arm.

(Be sure to relax the arm down to your side between these actions. The point of the movements above are to observe kinesthetically the different sensations during their execution.  If the muscles become overly tired, its more difficult to notice subtle differences – instead the muscles will become overly tense to compensate for fatigue.)

The following is a simple study frequently taught by teachers when introducing vibrato. Sliding the finger back and forth by 1/2 step is shown as a way of feeling the backwards movement of the vibrato. But the key component in developing a more natural and effortless approach is learning to allow the hand to ‘fall back’ with a feeling of release, in much the same way that the back and forth movement of the hand is a reaction to the movement in the arm, as in the above motion study.

Screenshot 2016-04-16 14.17.52

While the above study is done slowly, one should aim to cultivate quick oscillations in the fingers. It is important to note Dounis emphasis on movement being initiated by impulse in fingers. This process will become easier because the wrist is able to react to these quick oscillations of the fingers.

In the following section Dounis talks about a simple study to develop sense of balance transferred from finger to finger of the left hand. *“The hand should feel it is poised or balanced on the playing finger.  The transfer of this feelingIn the following section Dounis talks about a simple study to develop sense of balance transferred from finger to finger of the left hand. or balance from one finger to another constitutes the basis for a correctly produced vibrato. This results in a feeling of lightness and freedom in the left hand at all times. 

“Allow me to offer the following suggestions,” he said. “Vibrate on one string with the first and second fingers, both remaining down, on long notes. Then place the second and third fingers down on the string, vibrating with both of them together. Then vibrate with the third and fourth fingers together. Then play various skips, skipping from the first and second fingers to the third and fourth. 

“It is understood from the foregoing,” he added, “that it is an exercise to acquire the ability to be able to transfer the balance of the hand from one finger to another.”

  • Courtesy Byron Duckwell. Based on transcripts of interview with D. C. Dounis while in NYC.  According to sources, this is the only interview in which he spoke about his understanding of technique and proper functionality in string technique. Believed to have been given with Samuel Applebaum for a book.

/**/

Can We Talk About Teaching ‘Speed & Tempo’ Using A Violin With Cars On It?

by Rozanna Weinberger

Students have so many ways of taking in information. The question is how to teach in a way students understand with their bodies, and physical momentum.  Any time rhythm and tempo are felt in the body as well as intellectually understood the student is much more likely to have a more natural physical approach.

Student from Scarsdale Strings enjoying the violin!

Student from Scarsdale Strings enjoying the violin!heads but also their hearts and of course physically with their bodies. heads but also their hearts and of course physically with their bodies. 

Rhythm, tempo for example are concepts that can be physically understood when teacher asks students to walk at the tempo of certain animals and other creatures in nature for example: elephants, ants.

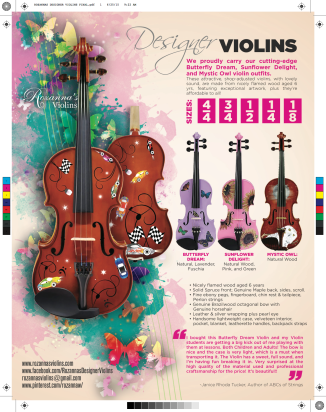
In the case of our new ‘Race Car’ design students and teachers can engage in dialogue about the speed of cars, how that speed is effected when turning a corner (or going from up to down bow and vice versa) and tempo differentiation.

Being conscious of change in movement/direction at tip of bow and frog are valuable experiences for young children.  Just as the elbow ‘releases’ slightly during the bow change, the speed of the bow also slows slightly. Cars do the same thing when turning a corner.  Imagine talking about how cars speed around corners using the shape of the violin and cars on it, and tactually tracing those movements.

Ah the newness of creating violins for children that have designs and are relatable sonically, physically as well as visually & imaginatively.  But when seen from the perspective of a jumping off point for more tactile education, I think they have value!!

Learning tools for children

Learning tools for children